
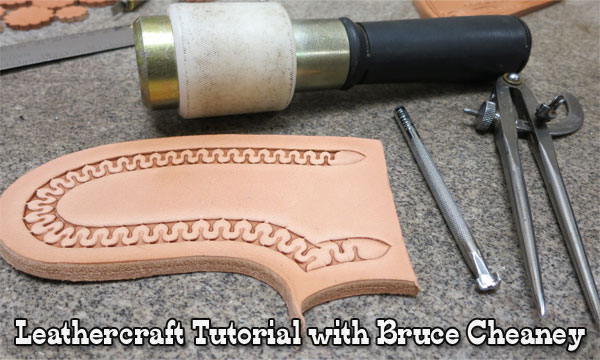
How to Stamp Leather Patterns Leathercraft Tutorial | Custom Leather Designs. This is leather stamping tutorial that I will show you how to stamp a running W type border tool made by Craftool. The part number for the Craftool I am using is a number D74400 marked CRAFTOOL USA.
The leather maul I like and use is made by Maul Master and is the economically priced mauls sold by The Weaver Leather Company. The part number for the maul I use in this YouTube Video is 65-2334 and it weighs 2 lbs and has 1-5/8″ striking surface. I also have the lighter Maul Master II and it weighs 22 oz. and it has the same width striking surface. I use the lighter maul for beveling and background work on my tooling and caving projects.

I start off by marking a 3/8″ channel and cut the border with my Barry King Leather Tools swivel knife. I like cutting a border like this because it gives depth to my stamping design.
Have patience with this leather tool and practice on some scrap leather before you do your actual leathercraft project.
A running border stamp like this works and looks good on saddles, belts, guitar straps, billfolds, purses and many other custom leather projects.
Thanks for taking your time to watch this leather stamping tutorial.
Bruce Cheaney Google+ Bruce on YouTube
Gainesville, Texas
Some of the resources I used for this leathercraft tutorial came from Tandy Leather Factory and my Maul Master leather mauls came from The Weaver Leather Company. The leather I used for the leather stamping is Hermann Oak Leather tanned in St Louis MO. I also used 6″ wing dividers made by C S Osborne and a brass swivel knife made by Barry King Leather Tools, Sheridan, WY.
Be sure to Bookmark Leathercraft Max and check back often for unique Leathercraft Tutorials.